Using DISM
Using DISM, the Deployment Image Servicing and Management tool in Windows 11. This is a powerful command-line utility to service and prepare Windows images. It is a versatile tool often used by IT professionals and system administrators for various tasks related to the deployment and maintenance of Windows operating systems.
Let us dive into it.
What is an image?
In this context, “image” refers to the underlying set of system files and configurations that make up your Windows 11 operating system, even if it is running on your laptop or computer. You can use the DISM tool to repair the Windows 11 installation on your computer. It does so by servicing and fixing issues in core components.
Image vs running OS
Image: in a general sense, an “image” can refer to a snapshot of the operating system’s state, often used for deployment or backup purposes. However, in the context of using DISM with the /Online switch, it specifically refers to the currently running Windows OS.
Running OS: this is your active Windows 11 installation, the operating system that is currently in use on your laptop or computer.
DISM with /online
Using the /Online switch with DISM means that you are targeting the currently running Windows operating system. Now, what does each command do to your active OS:
Check health: DISM /Online /Cleanup-Image /CheckHealth
Effect: scans the active Windows OS for any signs of corruption. It is a quick check that tells you if there are any problems.
Scan health: DISM /Online /Cleanup-Image /ScanHealth
Effect: performs a deeper scan of the active Windows OS to identify corruption. This is more thorough and takes longer.
Restore health: DISM /Online /Cleanup-Image /RestoreHealth
Effect: attempts to repair any identified corruption in the active Windows OS by using files from Windows Update or a specified repair source.
How does DISM repair the running OS
When you run the RestoreHealth command, DISM will:
Scan the system and look for any corrupted files or issues within the system files of your running OS.
Download necessary files, it will connect to Windows Update to download the necessary replacement files to fix any corruption.
Replace corrupted files with the downloaded or locally sourced clean versions.
Example
Suppose you have issues or general instability in Windows 11. This is how you can use DISM.
Open the Command prompt as administrator. Right click the Start button and select Command Prompt (Run as administrator) or PowerShell (run as administrator). Type the following command:
DISM /Online /Cleanup-Image /CheckHealth
If there are no issues, great. You do not need to take further action.
If there are issues, like corruption, you can perform a detailed scan. Type the following command:
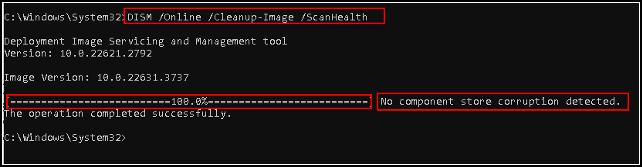
DISM /Online /Cleanup-Image /ScanHealth
This will take longer and provide more details on the health of your system image. Next, repair the system, type the following command:
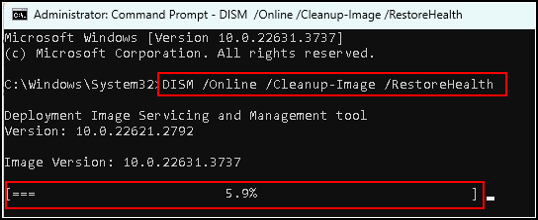
DISM /Online /Cleanup-Image /RestoreHealth
This will attempt to repair the corruption by downloading necessary files from Windows Update.
So, let us see this in action.
For this example I use the command propmt.
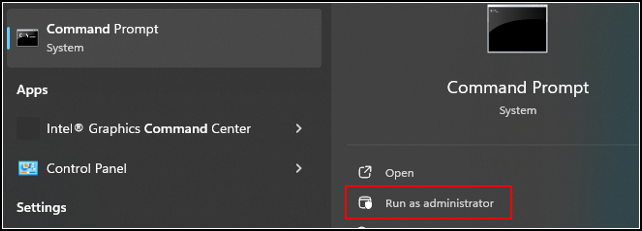
Let us go to the search bar and type “command”.

From the menu, select “Run as administrator”.
The system asks “do you want to allow this app to make changes to your device?”, select “Yes”.
The command prompt opens, now type:
DISM /Online /Cleanup-Image /CheckHealth
and when done press “Enter”.
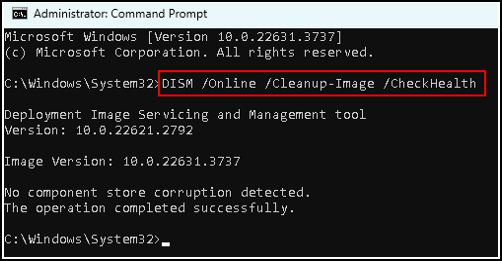
As you can see at the bottom, my computer has no roblems.
No issues found?
If there are issues, like corruption, go to the next step, type:
DISM /Online /Cleanup-Image /ScanHealth
and when done press “Enter”.
When this program runs, it displays a progress bar.
By using these DISM commands, you can help ensure that your Windows 11 system remains healthy and operational, fixing issues that might otherwise lead to system instability or failures.
Peronally, I always run these commands every 3 months.
So, the last command is:
DISM /Online /Cleanup-Image /RestoreHealth
Copy and paste this command to the command prompt and press enter.
I never had any issues that were repaired, so I can not say from experience if you get notified of any updates or changes.
Conclusion
The DISM command is used to perform maintenance and servicing tasks on the Windows operating system.
Check Health: quickly checks if there is any corruption
Scan Health: more thorough scan to detect any corruption, it will tell you if the image can be repaired.
Restore Health: scans for corruption and attempts to repair it. By default, it uses Windows Update to download necessary files for repair.
Note
For the RestoreHealth command, having an internet connection is necessary because it may need to download files from Windows Update to repair the image.
Running these commands can temporarily affect system performance as they scan and potentially repair system files.
These commands require administrative privileges, so make sure you are running the Command Prompt or PowerShell as an administrator.
Getting help
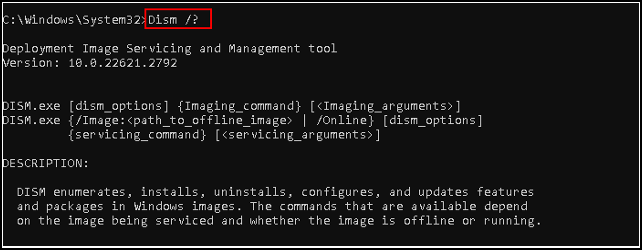
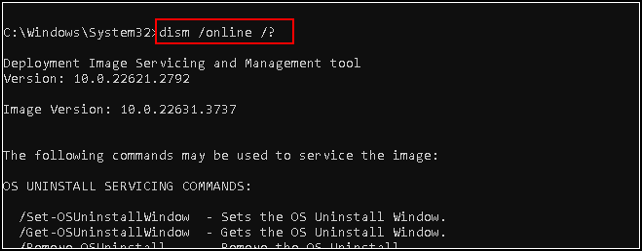
There is a help function available in the Command Prompt. This is an invaluable resource when you want to understand and utilize various commands. Type Dism /? into the Command Prompt, and you can access a comprehensive list of DISM commands and options. There is also a description and syntax examples. It is a quick reference guide that makes it easier for you to navigate and leverage the full capabilities of DISM. Whether you are troubleshooting system issues or preparing a Windows image for deployment, the help function ensures you have the necessary information to execute commands correctly and effectively.
Next are two examples of the help function.
DISM /?
DISM /online /?
As you can see, there is quite a list of available options. I suggest you check the internet for more information. If you are interested of course.
Note
A related command is SFC, you can find out more about that command in my post here.
This brings us to the end of my post on usin DISM.
Thank you for taking the time to read my post on usin DISM.
I hope you found it enjoyable and insightful.
Stay tuned for more content that is coming soon.
If you like what you read, please consider sharing it with others who might find it helpful.
Disclaimer
All tips and methods mentioned in this blog are tested on Windows 11. Please note that results may vary on other operating systems or versions of Windows. Adapt the instructions accordingly.
Copyright
© 2024 Henny Staas/safecomputer.org. Unauthorized use and/or duplication of this material without express and written permission from this site’s author and/or owner is strictly prohibited. Excerpts and links may be used, provided that full and clear credit is given to Henny Staas/safecomputer.org with appropriate and specific direction to the original content.