Using Check disk
In this post, using Check disk, we will find out how to start CHKDSK. We also take a closer look at some of the parameters we can use with this command. Finally we take a look at the results. But, before you run Check disk, read my previous post here to see what problems you may run in to.
Let us dive into it.
To run CHKDSK, we need to open a command prompt.
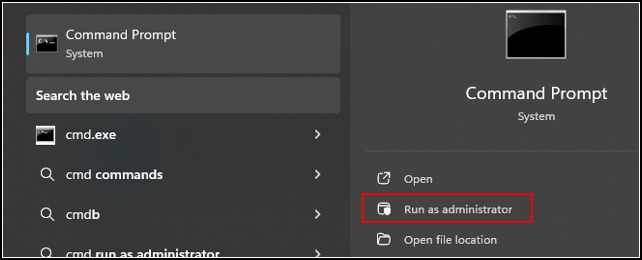
Go to the search bar, and type “cmd”.

Select “Run as administrator”.
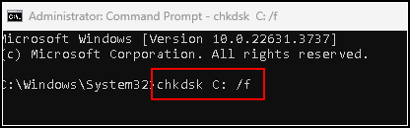
The message “Do you want to allow this app…” appears, select “Yes”. The command prompt opens.
Type the following command: chkdsk C: /f and press Enter.
(replace C: with the drive letter you want to check).
My laptop always displays the following message:
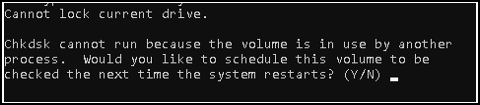
If you want it to run now, you have to type “y” and restart your computer.
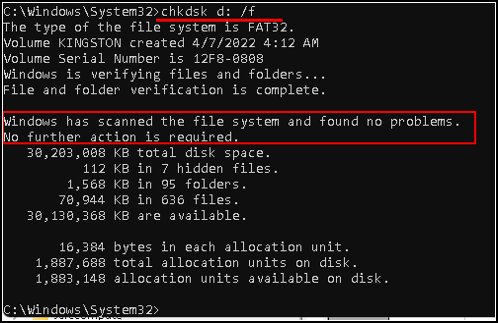
In this case I run it on a USB drive that I attached to my computer. This gives you an idea of the output:
Using File explorer
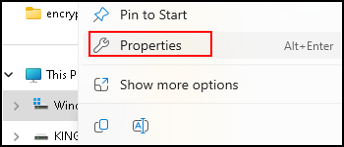
Another way to start Check disk is via File explorer. Open file explorer and right click the drive you want to check. Then select “Properties”.
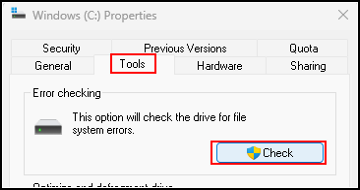
When the Properties open, select the tab Tools, and select Check.
If you selected Check, a new screen opens. Since I have run Check disk already, a message pops up that I do not have to scan this drive again.
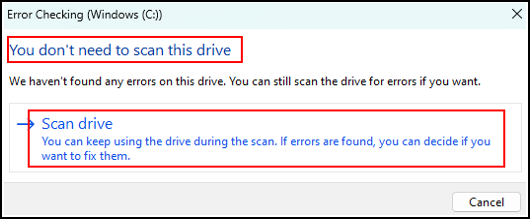
There is of course an option to scan it anyway.
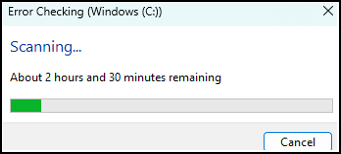
A progress bar shows to indicate the remaining time.
If you have not run Check disk before, you should get two options.
Automatically fix file system errors, the /f parameter.
Scan for and attempt recovery of bad sectors, the /r parameter.
When you made your selection, a progress bar shows to indicate the remaining time.
The result
What can be the outcoome of running Check disk on your computer?
No errors found, your system is healthy.
Errors found and fixed, CHKDSK has repaired the issues.
Errors found but not fixed, the reasons can include running CHKDSK without administrative privileges or more severe hardware issues.
What to do if CHKDSK finds errors?
Backup important data. Make sure you back up all your data before performing repairs.
Run CHKDSK again. This may help, sometimes a second scan is necessary.
Seek professional help. If errors persist, it might indicate a failing hard drive that needs replacement.
CHKDSK parameters
/f: Fixes errors on the disk.
/r: Locates bad sectors and recovers readable information.
/x: Forces the volume to dismount first if necessary.
/scan: Runs an online scan on an NTFS volume.
Examples
chkdsk C: /f /r /x for a comprehensive scan and repair.
chkdsk D: /scan for an online scan for the D: drive.
Additional CHKDSK parameters
/i: (NTFS only) for a less vigorous check of index entries. This reduces the amount of time required to run CHKDSK by skipping certain checks of index entries.
/b: (NTFS only) clears the list of bad clusters on the volume and rescans all allocated and free clusters for errors.
/c: (NTFS only) not check cycles in the folder structure. Reduces the time required to run CHKDSK by skipping certain checks of the folder structure.
/perf: use more system resources to complete the scan as fast as possible. Has a performance impact on other running applications.
/spotfix: (NTFS only) runs spot fixing on the volume.
/sdcleanup: (NTFS only) garbage collect unneeded security descriptor data.
/offlinescanandfix: runs an offline scan and fix on the volume.
/freeorphanedchains: (FAT/FAT32/exFAT only) to free any orphaned cluster chains instead of recovering their contents.
/markclean: (FAT/FAT32/exFAT only) to mark the volume clean if no corruption is detected, even if /f is not specified.
CHKDSK with no parameters checks the volume for errors without fixing them. Useful for a quick check to see if there are problems without making any changes.
Run on SSD
Running CHKDSK on SSDs is generally safe, it is not as beneficial as on HDDs since SSDs have wear leveling and other mechanisms to handle bad sectors. However, it can still fix file system errors.
This brings us to the end of my post on Using Check Disk.
Thank you for taking the time to read my post on Using Check Disk.
I hope you found it enjoyable and insightful.
Stay tuned for more content that is coming soon.
If you like what you read, please consider sharing it with others who might find it helpful.
Disclaimer
All tips and methods mentioned in this blog are tested on Windows 11. Please note that results may vary on other operating systems or versions of Windows. Adapt the instructions accordingly.
Copyright
© 2024 Henny Staas/safecomputer.org. Unauthorized use and/or duplication of this material without express and written permission from this site’s author and/or owner is strictly prohibited. Excerpts and links may be used, provided that full and clear credit is given to Henny Staas/safecomputer.org with appropriate and specific direction to the original content.