Windows Command Prompt Part 3
Windows Command Prompt Part 3: Rename, Wildcards ?, Search Subfolders, and saving Output to Files
Welcome to the final chapter (for now!) of my Command Prompt series.
In Part 1 we covered navigation (CD) and listing (DIR with * wildcards).
Part 2 showed copying, moving, and deleting.
Today: renaming files, the ? wildcard, searching subfolders, and saving output to text files.
All screenshots from my Windows 11 machine.
REN – Rename Files
REN (or RENAME) changes a file name.
Example:
REN 1z1.txt b23k.txt
This renames 1z1.txt to b23k.txt.
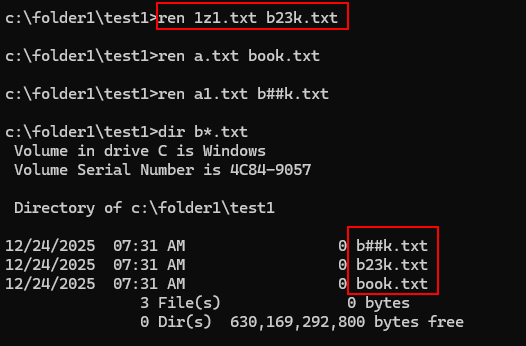
You can use wildcards with REN too (as REN *.txt *.old, adds .old to all .txt files).
The ? Wildcard – one character only
We already know * = any number of characters.
? = exactly one character.
Example: find 4-character files starting with b and ending with k:
DIR b??k.*
Shows files like book.txt, bark.docx, etc.
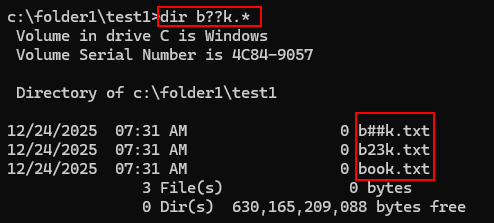
Great for precise searches when you know the length.
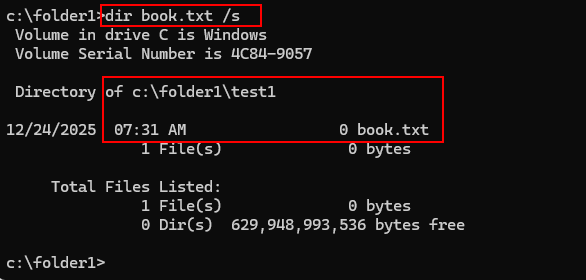
Searching in Subfolders with /s
Add /s to DIR to search the current folder and all subfolders.
Example (from folder1):
DIR book.txt /s
Shows the full path where book.txt is found.
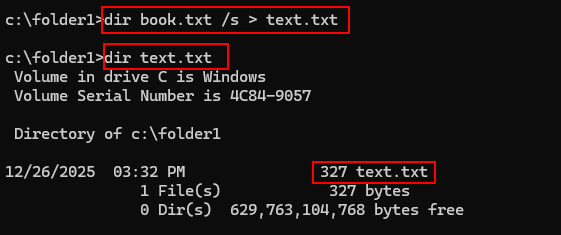
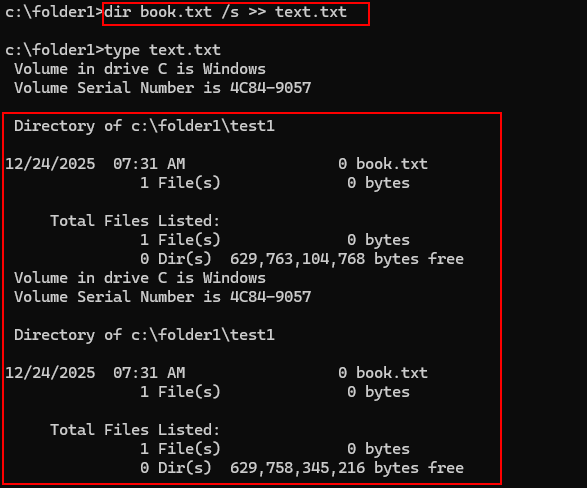
Store output in a text file.
Redirect output with > (overwrite) or >> (append).
Create a file with search results:
DIR book.txt /s > text.txt
No screen output, everything goes to text.txt.
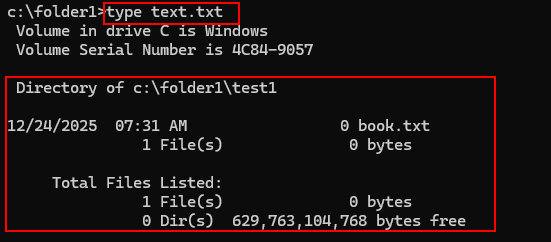
View the file with TYPE:
TYPE text.txt to display the contents of the file.
Append more results:
DIR book.txt /s >> text.txt
My quick tips
Use REN for bulk renaming (with wildcards).
? for fixed-length patterns.
/s + > = powerful search logs.
Always test in a safe folder!
End of the series (for now)
These commands cover what I use CMD for 95% of the time, fast, no GUI needed.
PowerShell is great for advanced scripting, but CMD is simple, always there, and nostalgic.
If you’d like more (batch files, piping, environment variables), let me know in the comments!
Thanks for following the series, hope you enjoyed revisiting the old green-screen magic.
This brings us to the end of my post on Windows Command Prompt Part 3.
Thank you for taking the time to read my post on Windows Command Prompt Part 3.
I hope you found it enjoyable and insightful.
Stay tuned for more content that is coming soon.
If you like what you read, please consider sharing it with others who might find it helpful.
Contact me
If you have any questions or want to contact me, please drop me an email at info@safecomputer.org
Stay updated with my monthly newsletter
Subscribe to Safe Computer’s monthly newsletter in the right sidebar for tips on job applications, cybersecurity, and more! Get summaries of my latest posts, like this Database Crimes, straight to your inbox. Join now at safecomputer.org!
Disclaimer
All tips and methods mentioned in this blog are tested on Windows 11. Please note that results may vary on other operating systems or versions of Windows. Adapt the instructions accordingly.
Copyright
© 2025 Henny Staas/safecomputer.org. Unauthorized use and/or duplication of this material without express and written permission from this site’s author and/or owner is strictly prohibited. Excerpts and links may be used, provided that full and clear credit is given to Henny Staas/safecomputer.org with appropriate and specific direction to the original content.