Windows Restore Points
Performing a System Restore
With system restore points you can revert your system settings and configuration to a state that existed at the time the selected restore point was created. Let us continue from my previous post where I explained how to create windows restore points.
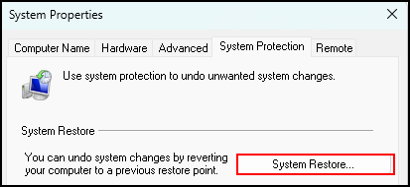
Let us go back to the System Properties and select the tab System Protection.
To place the system back in time, click System Restore.
The Restore system files and settings screen appears.
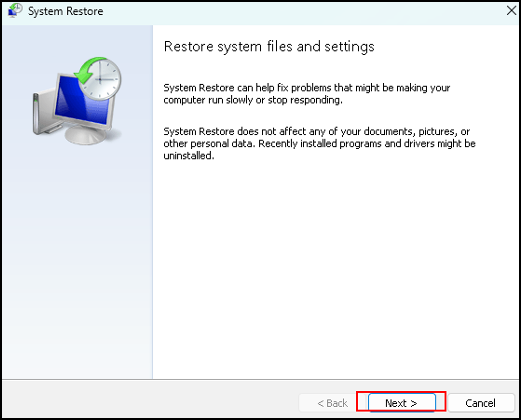
Read the text.
It says: “System Restore can help fix problems that might be making your computer run slowly or stop responding”.
The last sentence says: “Recently installed programs and drivers might be uninstalled”.
As you see, there is no guarantee, it can help, and it might be.
Click Next.
A list of all your windows restore points appears.
The button “Scan for affected programs” is grayed out.
This option is only available when you select a restore point.
Click a restore point to enable the option “Scan for affected programs”.
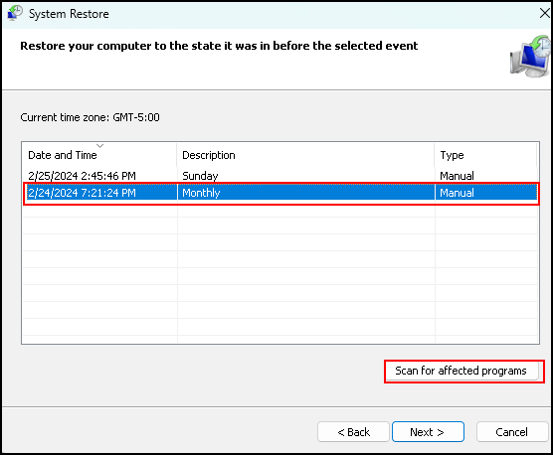
Let us select a restore point, and click Scan for affected programs. The scan starts directly.
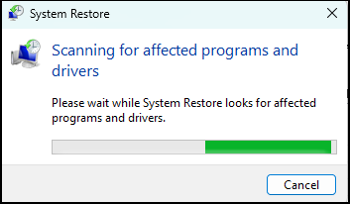
The system displays the results once the scan finishes.

Here is what happens. You place your computer “back in time”. The state of your computer will become as it was at the time your windows restore point was created. What are the consequences of this?
Programs you installed after the Restore Point was created: these programs are on your computer now, and they will be removed.
Programs you removed after the Restore Point was created: these programs are not anymore on your computer, and they will be restored.
In the example above, I deleted Libre Office from my computer. Selecting this restore point restores Libre Office on my computer.
There is a delicate difference between “Restore” and “Reinstall”. At the end of the Conclusion I explain the difference.
When you are sure you want to continue, click Close.
This takes you back to the screen where you selected the restore point, click Next.
The final screen appears, with a summary of what you are about to do.
The description of the restore point is shown.
You have again the option to scan for affected programs.
There is one final but important question.
Did you change your password since the restore point you are about to install?
If you did, and you do know that old password, there is no problem. You can install the restore point and login with your old password.
If you do not know your old password, type “create a password” in the search bar, launch the correct application, and follow the instructions.
The last comment is that your computer will restart. Make sure you saved all your work before you click Finish.
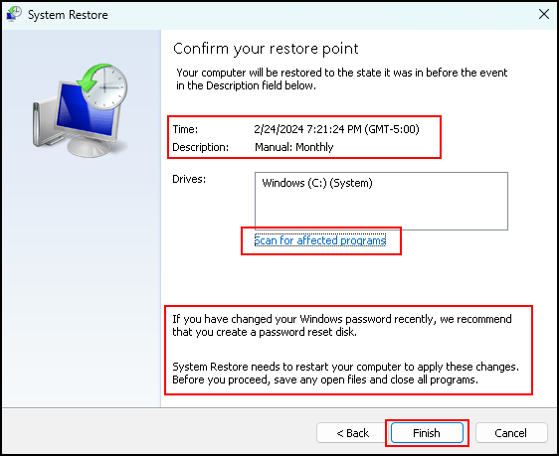
If everything is ok, click Finish to install the restore point.
Windows restore points: conclusion
As you have seen, windows restore points can be useful for a variety of reasons, and users with varying levels of computer skills should enable this feature.
Let us do a quick recap of why windows restore points can be so useful.
Recovery from system failures:
Even the most tech-savvy users can encounter unexpected system failures due to software conflicts, driver issues, or malware infections. Restore points provide a simple way to revert your system to a previous, stable state, saving time and effort in troubleshooting and resolving the problem.
Software installation:
Installing new software can sometimes lead to unforeseen consequences such as system instability or conflicts with existing programs. Having windows restore points allows you to quickly roll back any changes made during the installation process, ensuring your system remains functional.
Driver updates:
Updating drivers is crucial for maintaining system compatibility and performance. Occasionally, a driver update can cause issues such as hardware malfunctions or system crashes. Windows restore points provide a safety net by allowing you to revert to a previous driver configuration if the updated one turns out to be problematic.
Experimentation and learning:
If you are learning about computers or experimenting with new settings, applications, or configurations, windows restore points offer a way to safely explore without fear of permanently damaging your computer. If something goes wrong, you can simply restore your system to a known good state and continue your exploration.
Dependency on others for technical support:
Maybe you lack the expertise to troubleshoot and resolve computer problems and you have to rely on friends, family, or professional technicians for technical support. Having windows restore points in place makes it easier for support personnel to revert your system to a stable state.
Especially if you have limited computer skills or are afraid to damage your computer, create a restore point once a month. As long as you only create new restore points there should be no risk that you damage something.
Make a routine that you create a new restore point once in a month, like in the first weekend of the new month. This way you always have a maximum one month old backup of your system.
If you want to delete older Restore Points, simply delete them all with the button in the Configure screen, and create a new Restore Point right after that.
And if you run into an unstable system, ask a friend to revert your system.
The difference between restoring and re-installation:
Windows restore points restore programs, not reinstall them. What is the difference?
Restore: revert system settings, configuration files and applications. This does not guarantee that these applications work as they should.
Reinstall: first uninstall the application, and install the application again from scratch. This should guarantee that the application works as expected.
To be on the safe side.
If you see that applications will be restored, that means that you deleted them.
The question is, do you need these applications? If you need them, consider to uninstall the applications followed by a new installation.
Do not forget to read my first blog om Restore Points here.
Restore points do not affect your personal files. To have a type of backup of these files, read my post on File history here.
For another backup scenario, take a look at my post on File history here.
Thank you for taking the time to read my post on windows restore points
I hope you found it enjoyable and insightful.
Stay tuned for more content that is coming soon.
If you like what you read, please consider sharing it with others who might find it helpful.
Disclaimer
All tips and methods mentioned in this blog are tested on Windows 11. Please note that results may vary on other operating systems or versions of Windows. Adapt the instructions accordingly.
Copyright
© 2024 Henny Staas/safecomputer.org. Unauthorized use and/or duplication of this material without express and written permission from this site’s author and/or owner is strictly prohibited. Excerpts and links may be used, provided that full and clear credit is given to Henny Staas/safecomputer.org with appropriate and specific direction to the original content.